Here we go! Obviously, you need a wreath form (I did the green vs the white round ones because the styrofoam is easier to push into) and I started with these floral pins, but quickly switched to regular straight pins to save my poor fingers. Plus they are cheaper than the floral pins. However, the floral pins obviously give better hold, so a thimble might elliminate the sore finger issue.
You need to fold the coffee filters. I only did one at a time, but perhaps two at a time would give a different look.
Half, quarter, sixth (I think) Just fold halves three times.
Then its time to start pinning!
You can fold a bunch, or do them one at a time. I alternated between the two methods as my mood suited me.
See what I mean? Fluffing makes them look fuller and less coffee filter like. And when the wreath is done, you'll be really glad you took the time to complete this step.
Two-thirds done. This is where I started shaping the wreath. I decided not to wait to the end because I've been known to get carried away with my shearing. So I just started to trim them all to the overall same lengths and worried about the exact shape later. Also, you will now probably think that you are so close to the end based on the green to white ratio. However, that would be very misleading. I would say I had at least another hour + left to go at this point.
NOW you are almost done! :) When I got to the place where the two directions met each other I started fluffing them before I pinned them instead of after like I had been doing.
Here is the wreath finished being pinned. You can see it still needs to be shaped (by the cetner) and also trimmed a little bit more to keep the edges more even.
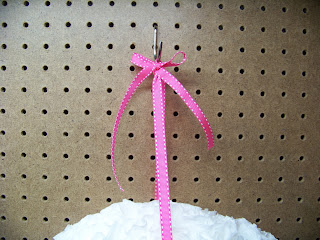
Now you have some choices. You can leave it and call it good. Great wreath as is. Or you can color it with inks. You could add some embellishments. Or you can do like I did and add a simple ribbon.
Hubs picked out Red ribbon which just looked to christmas like for me. I wanted yellow, but didn't have any. So, pink it is! Which I think works perfectly.
ta-da! (See more pics on my etsy.)
So go ahead, give this one a try!


Thank you so much for linking up to my first link party last Friday! Party #2 is live, and I would love for you to come link up something new!
ReplyDeletehttp://www.mom4realky.blogspot.com/2012/02/4-real-friday-link-party-2.html
Jessica @ Mom 4 Real